
IN THIS ARTICLE:
Watch this short video to learn how to best manage your leads in Inteleagent
Managing your lead contacts is at the core of every CRM software and would top the list of reasons why you would look to implement a CRM software in your education agency operations. Inteleagent shines when it comes to lead management. Here are a few things you should know when managing your leads through Inteleagent:
Lead management pipeline
To better manage and track your lead contacts, we suggest using a pipeline.
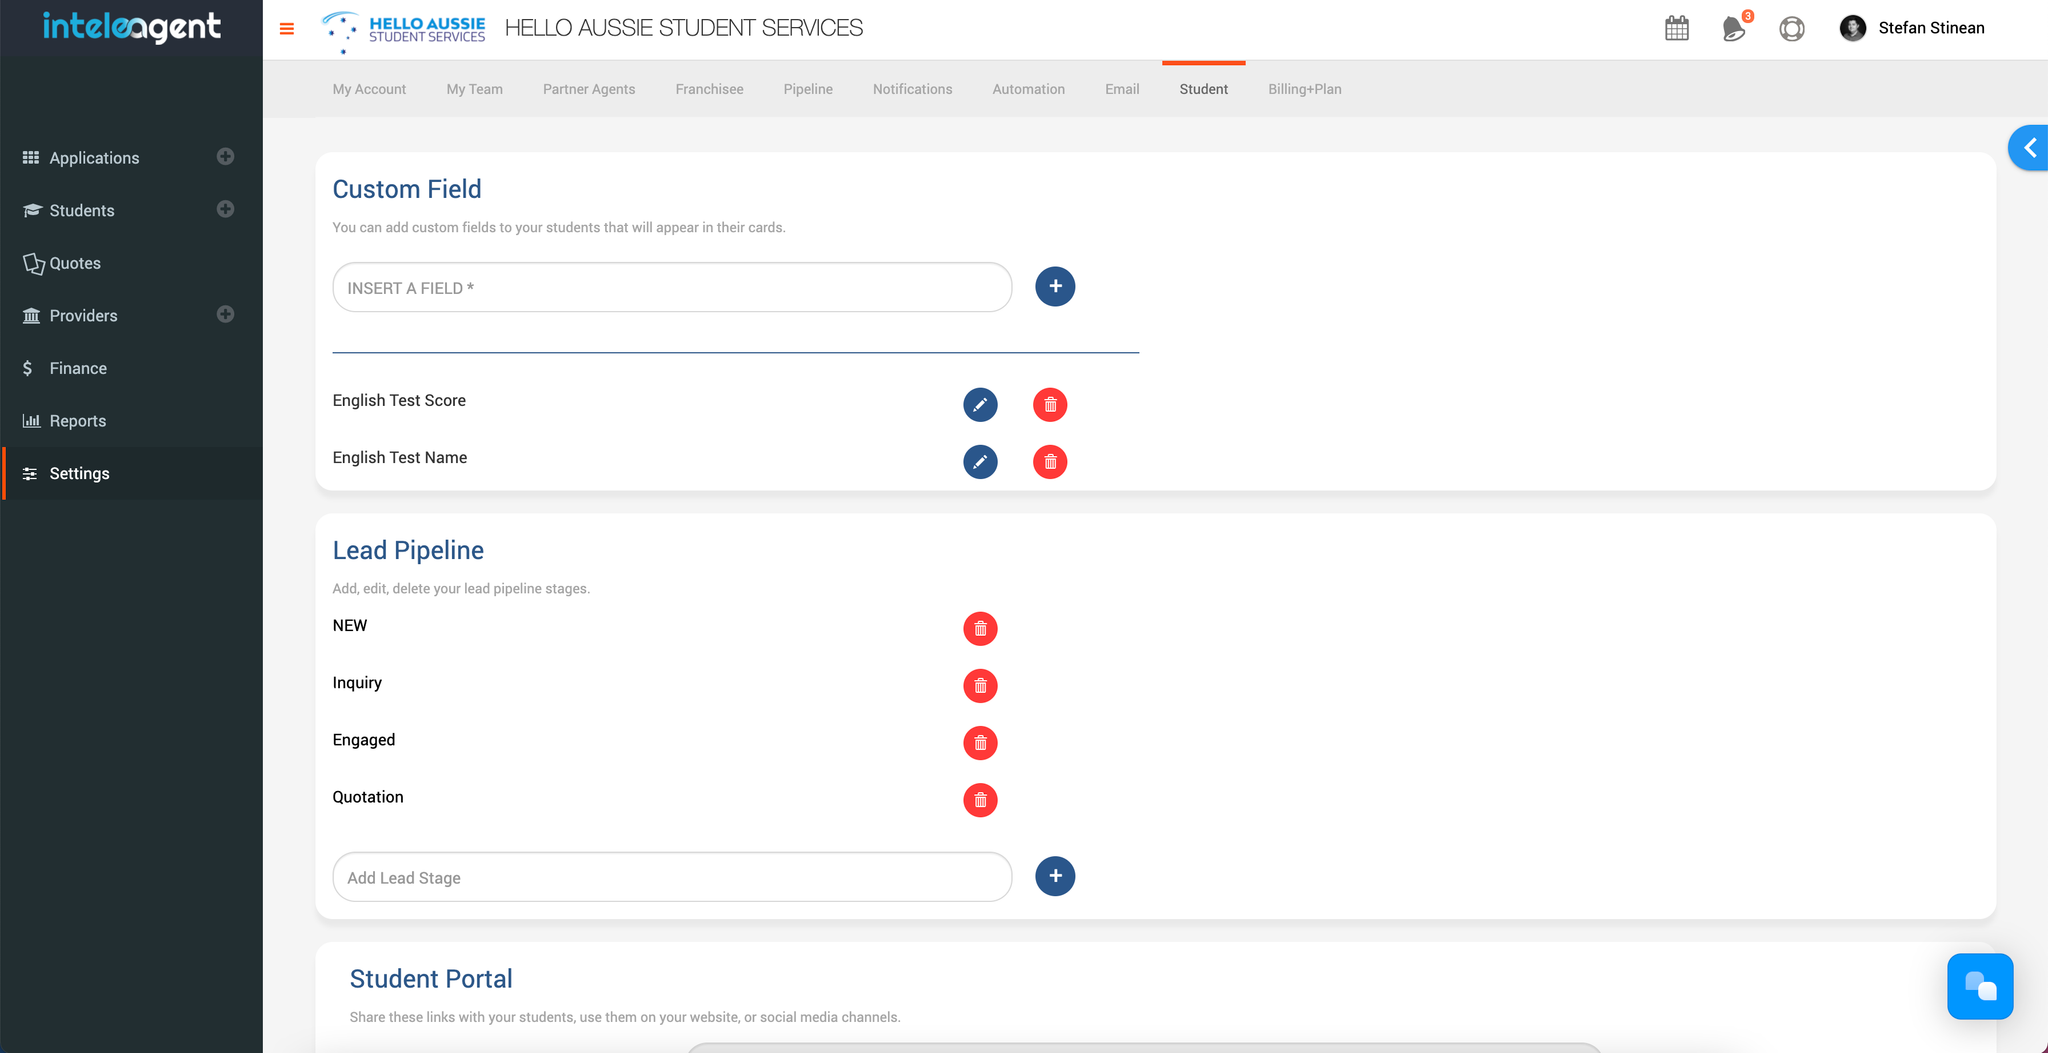
You can build and customise your lead pipeline in
Settings → Student in the Lead Pipeline section. You can easily build the pipeline, edit the stage names, or delete stages. You can change the student pipeline stage in student's profile.
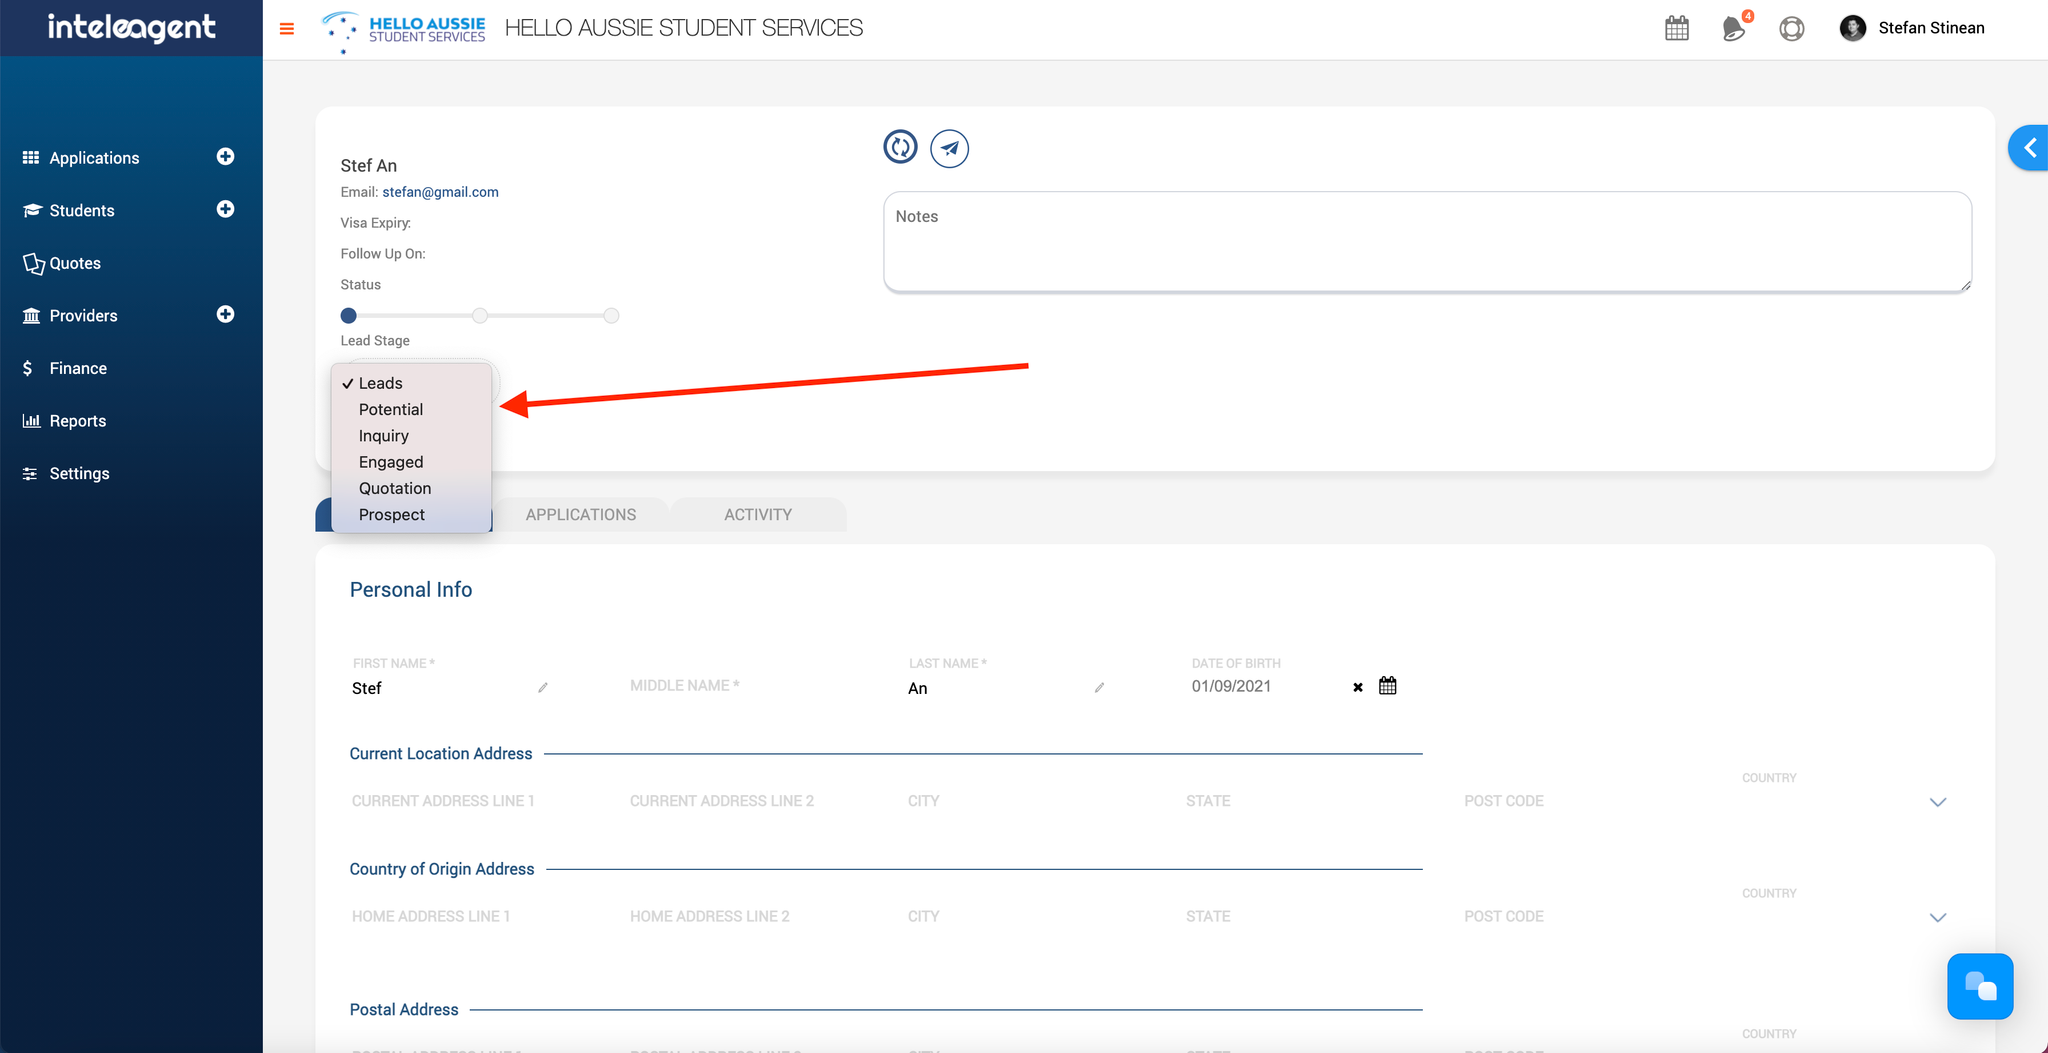
You can only have one lead pipeline at a time.
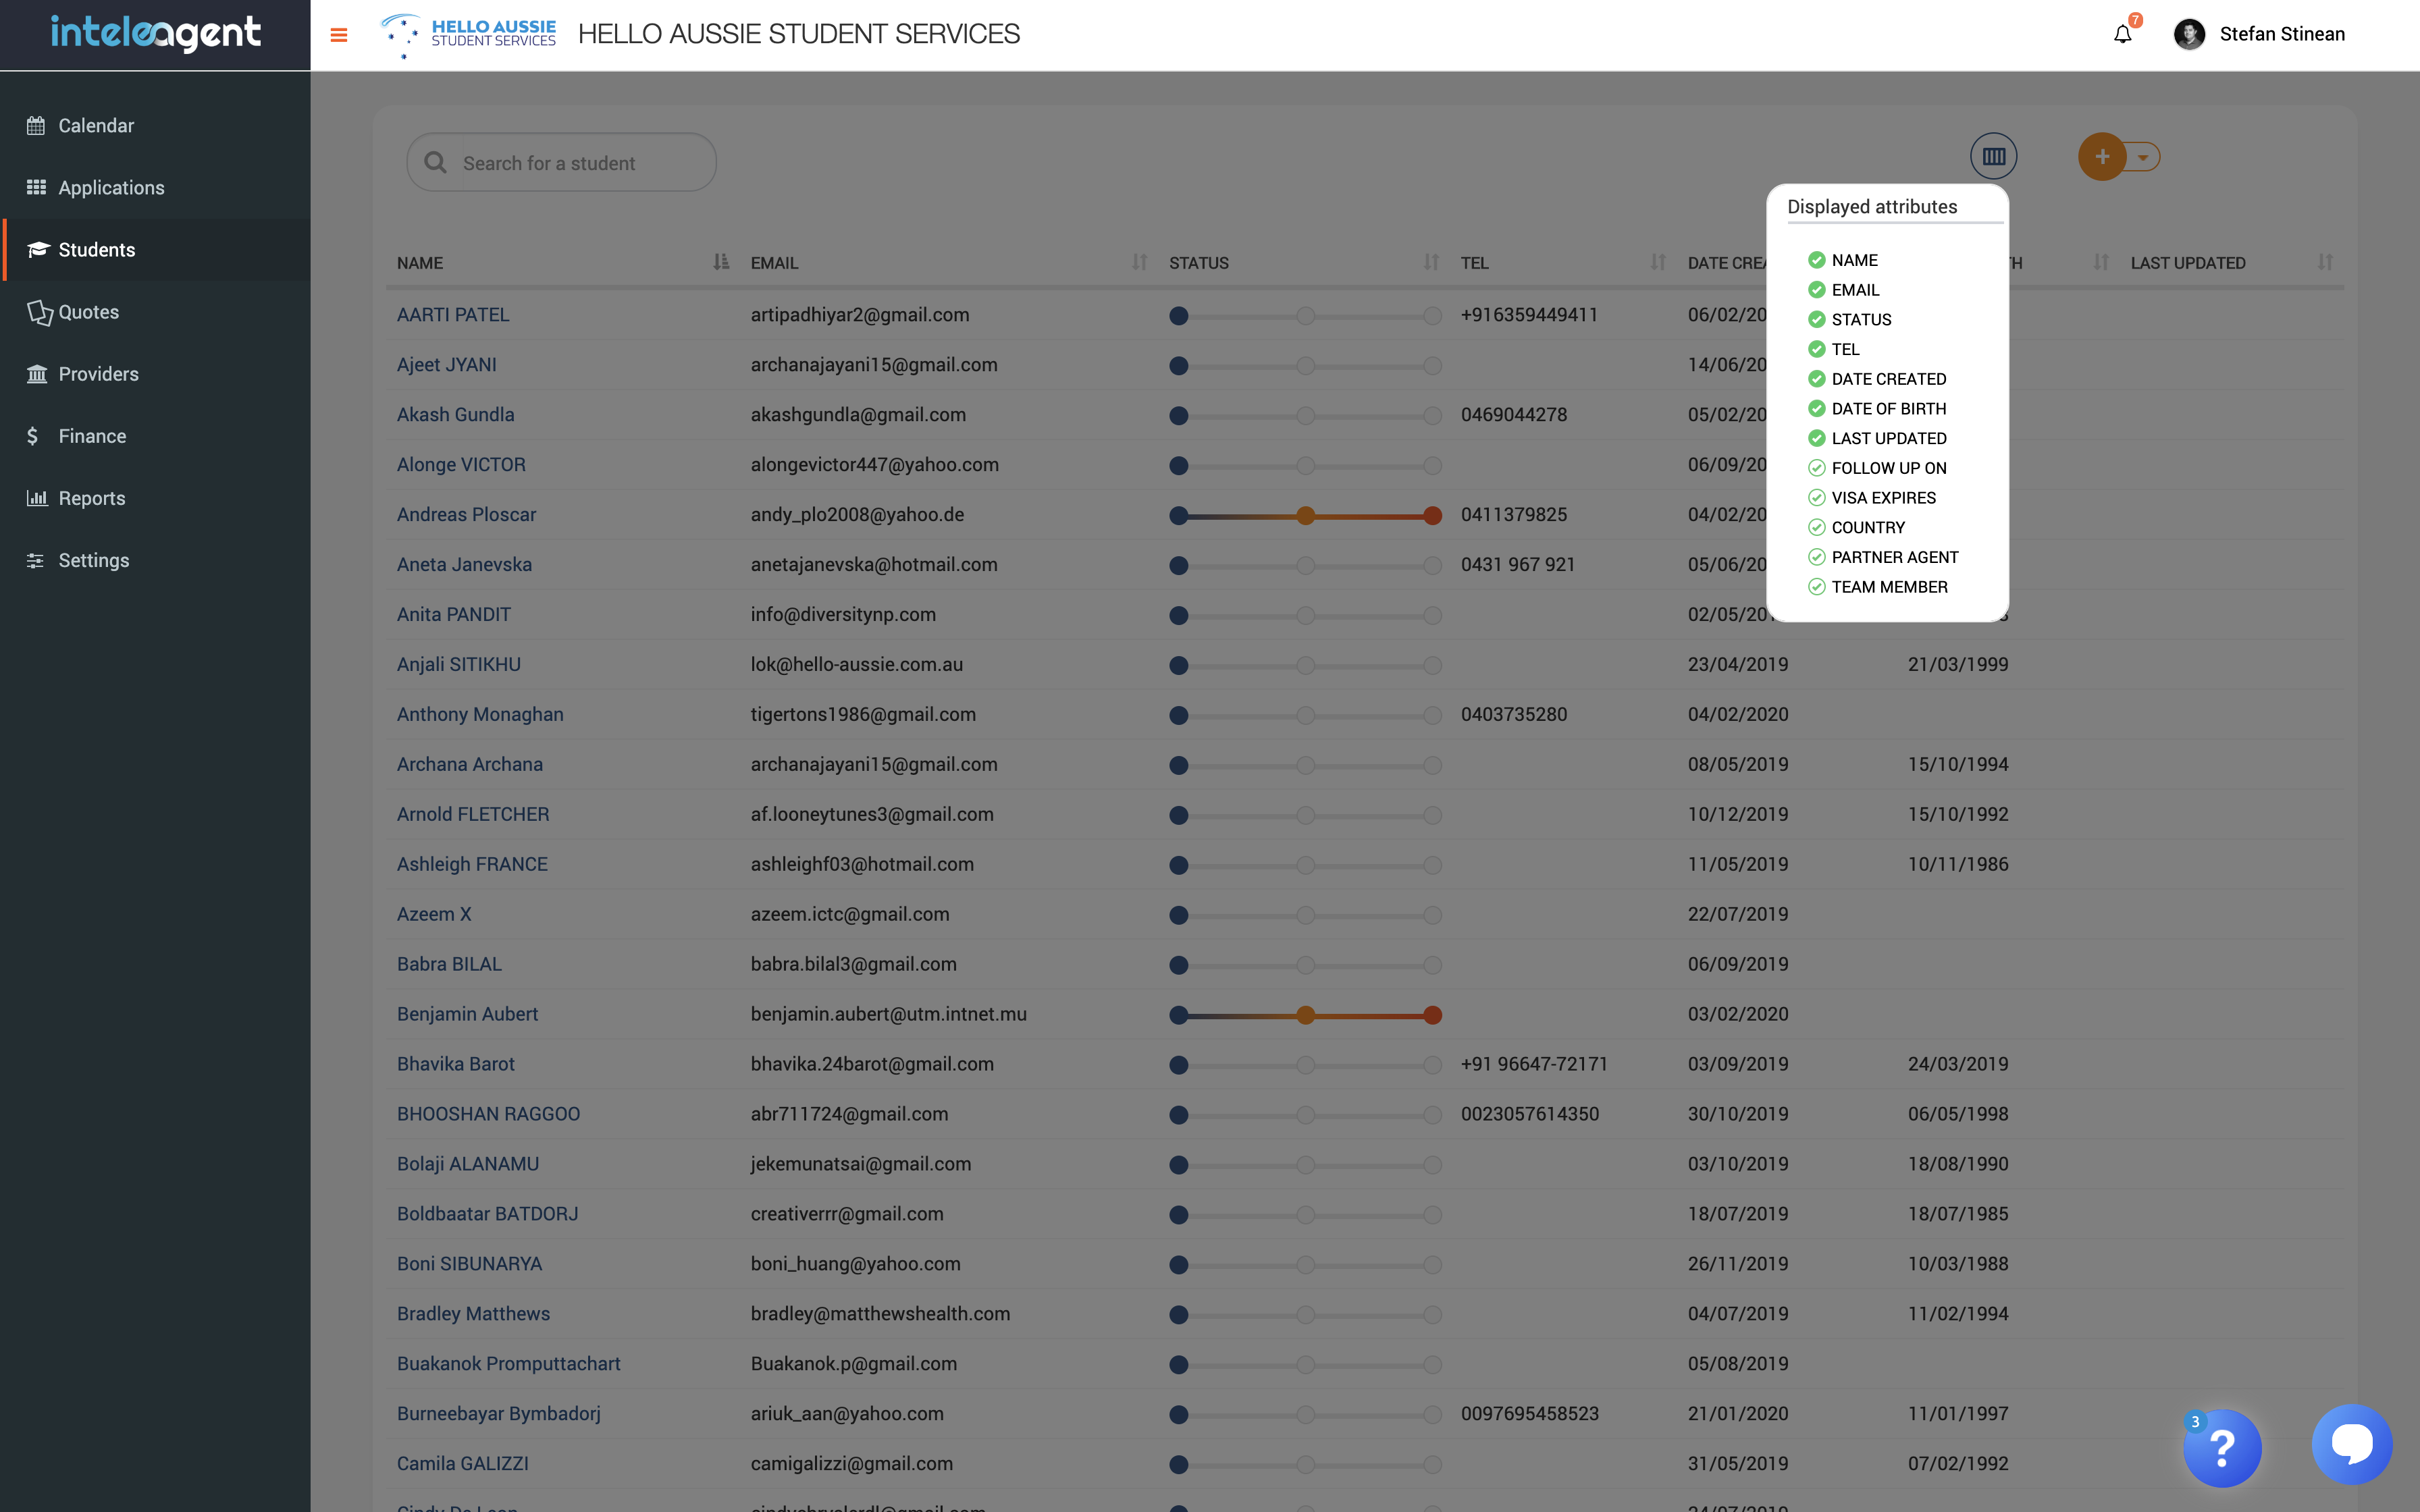
Displayed attributes
You might look at the Students menu and think: “”It’s too much information displayed here!” No problem… Inteleagent allows you to choose the attributed you want displayed. You have a choice from: NAME, EMAIL, STATUS, TEL, DATE CREATED, DATE OF BIRTH, LAST UPDATED, FOLLOW UP ON, VISA EXPIRES, COUNTRY, PARTNER AGENT, and TEAM MEMBER.
Status
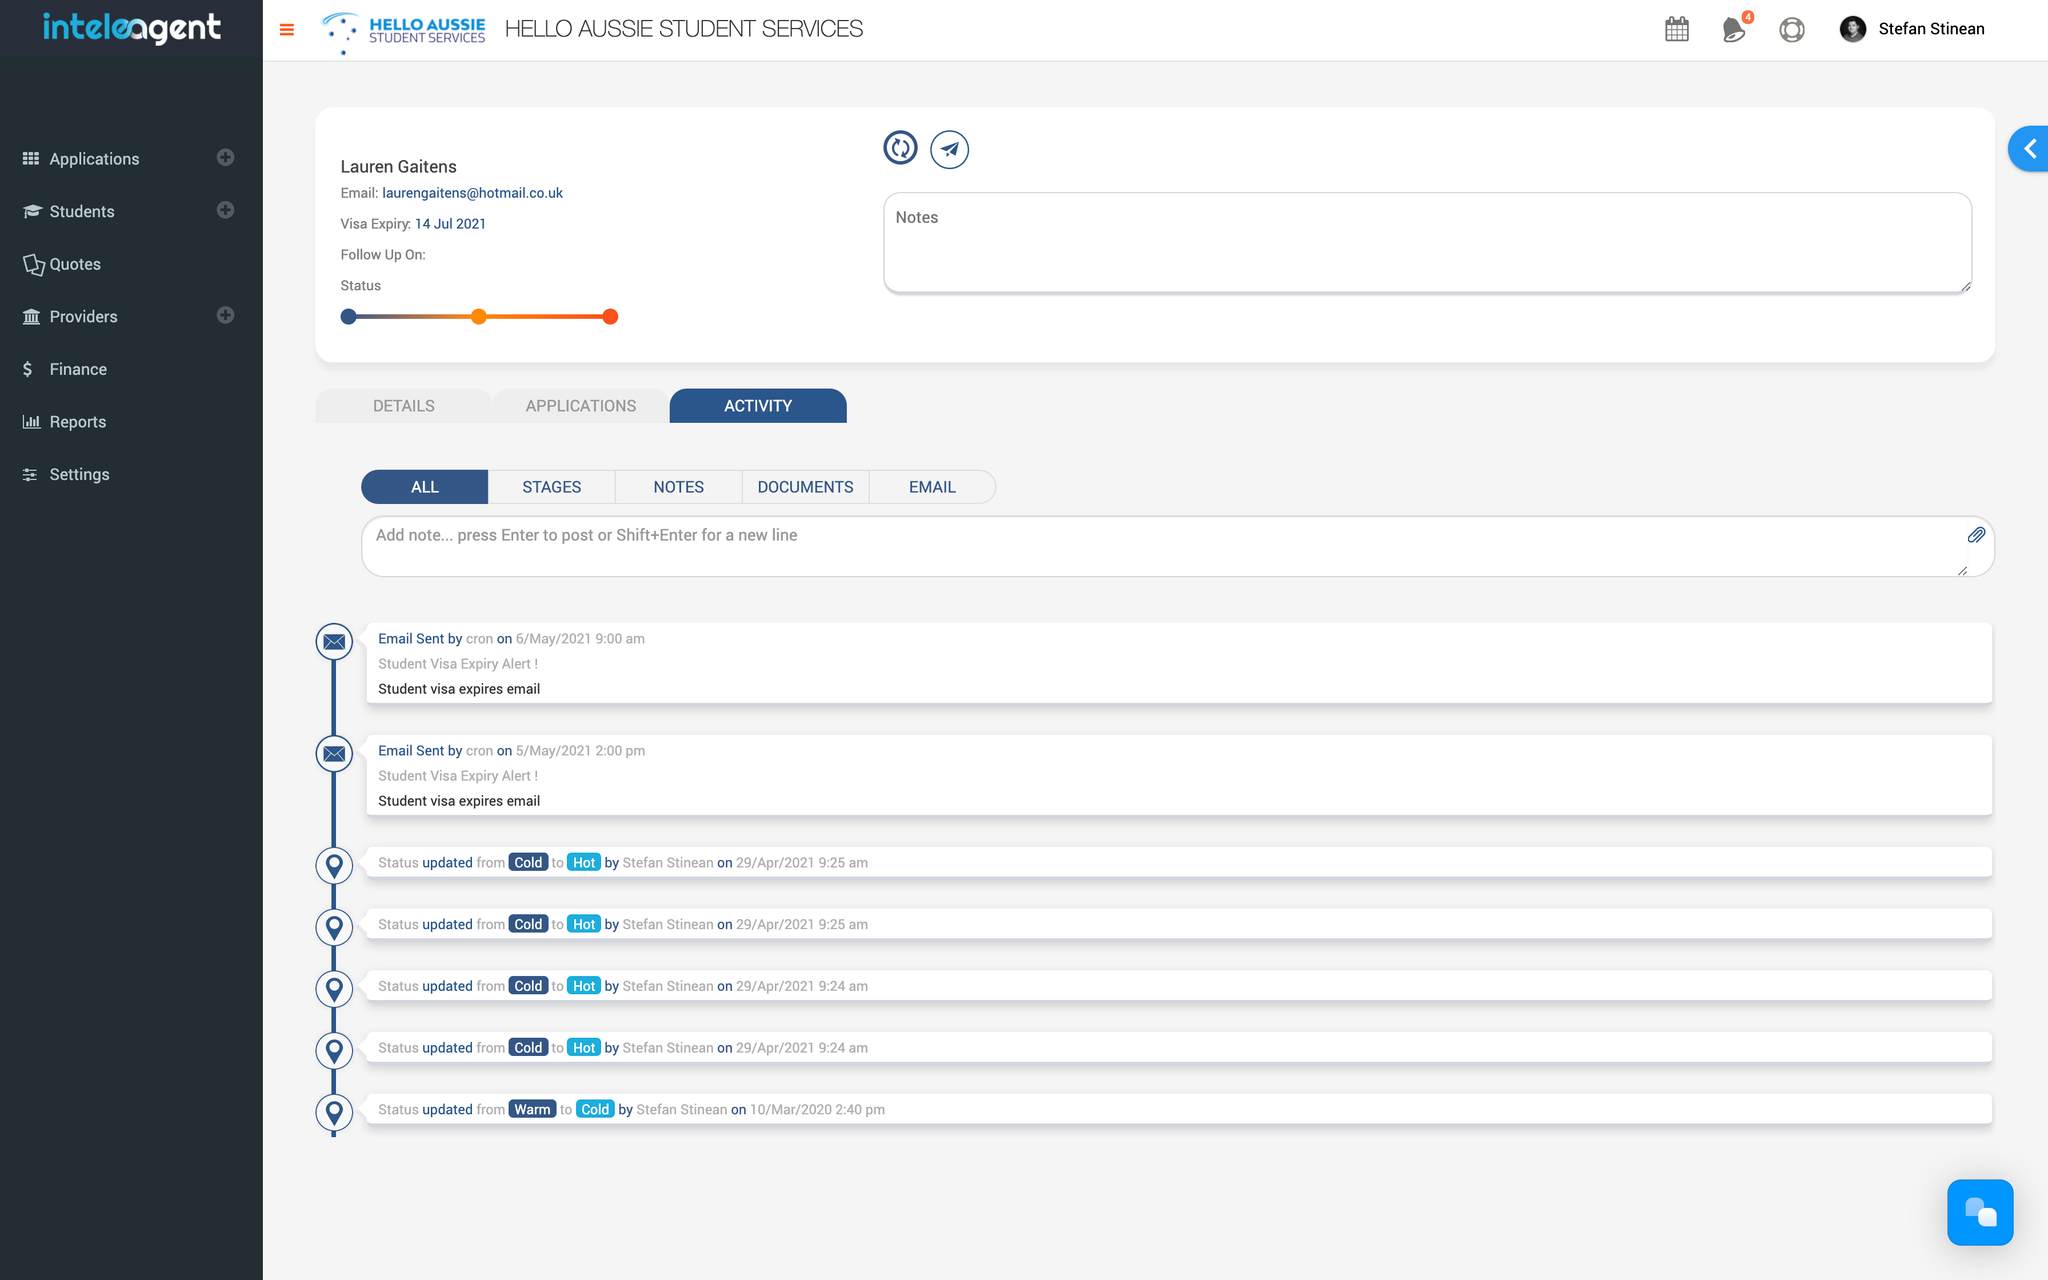
This is a feature similar to Lead Scoring in your general CRMs. You are able to score your leads depending on how likely they are to convert to an actual study application. You can choose how Cold, Warm, or Hot they are when it comes to converting. Every change in status is recorded in the lead Activity timeline.
This feature is especially useful when used in conjunction with the sorting feature. You are able to sort the status of your students, the ones who are hot will appear on top of the list.
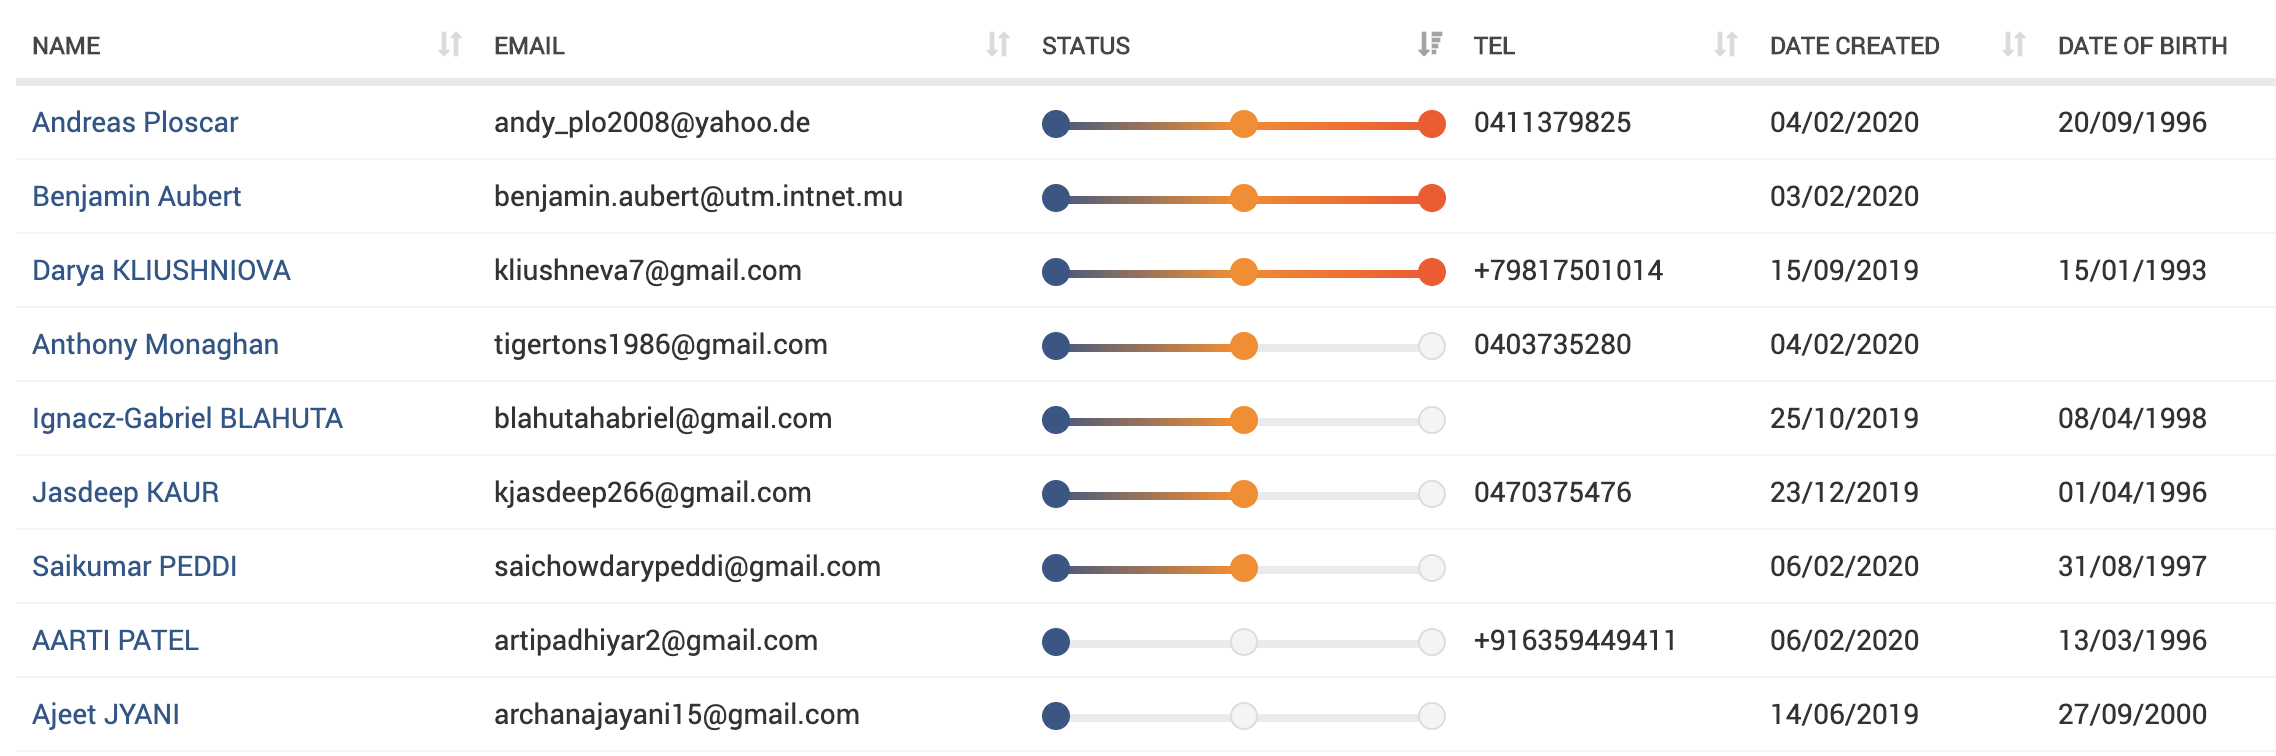
Your default landing for this page will display lead contacts based on the date they were created meaning, the last created lead will show up at the top of the list.
Activity
This feature will allow you to track any changes in your relationship with your lead. Events recorded in the timeline are:
- status changes
- notes
- documents uploaded to your lead's profile;
- 'invoice sent to client' event (if the toggle is set to ON in
Settings→Automations)
- 'student visa expires' event;
- 'passport expires' event;
Documents uploaded here will sync with all applications associated with the student. Documents uploaded to a particular application will not sync with the documents in the student profile.
A lead will become a student when you add an application to its profile.
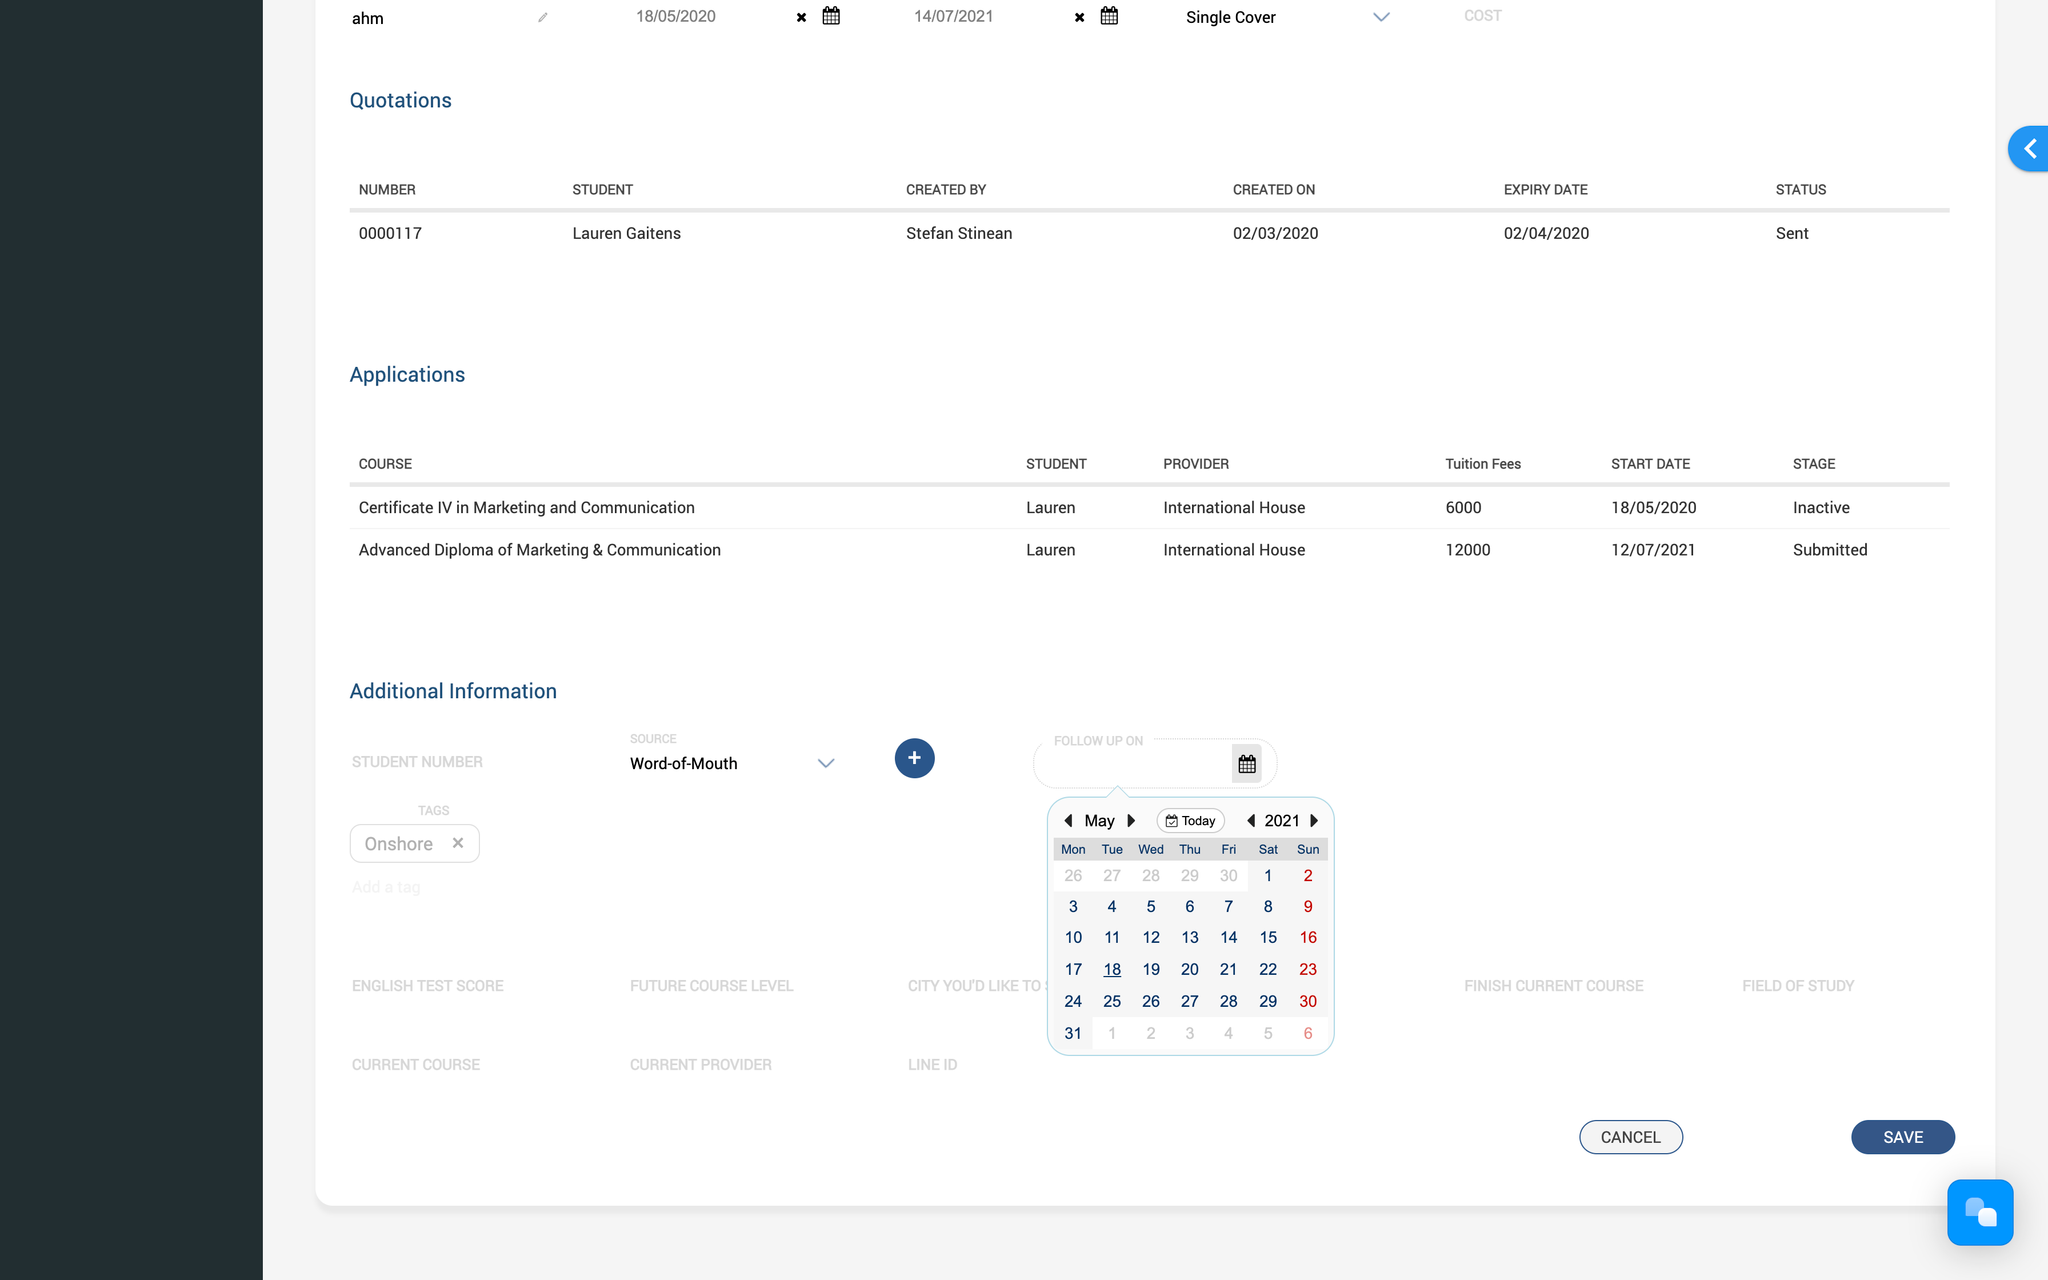
Follow Up
Never lose a student again. How many times did you forget to follow-up with a student? Not anymore. The follow up feature will remind you on the set date, to follow up with students so you don’t loose any of them.
You can find it in the student profile, under the DETAILS tab, down the bottom:
Visa Expiry Date
Never lose a student again. How many times did you forget a student's visa expiration date? Not anymore. The Visa Expiry field feature will remind you and your student, when the student's visa expires.
You can find it in the student profile, under the DETAILS tab, in the
Current Visa info section: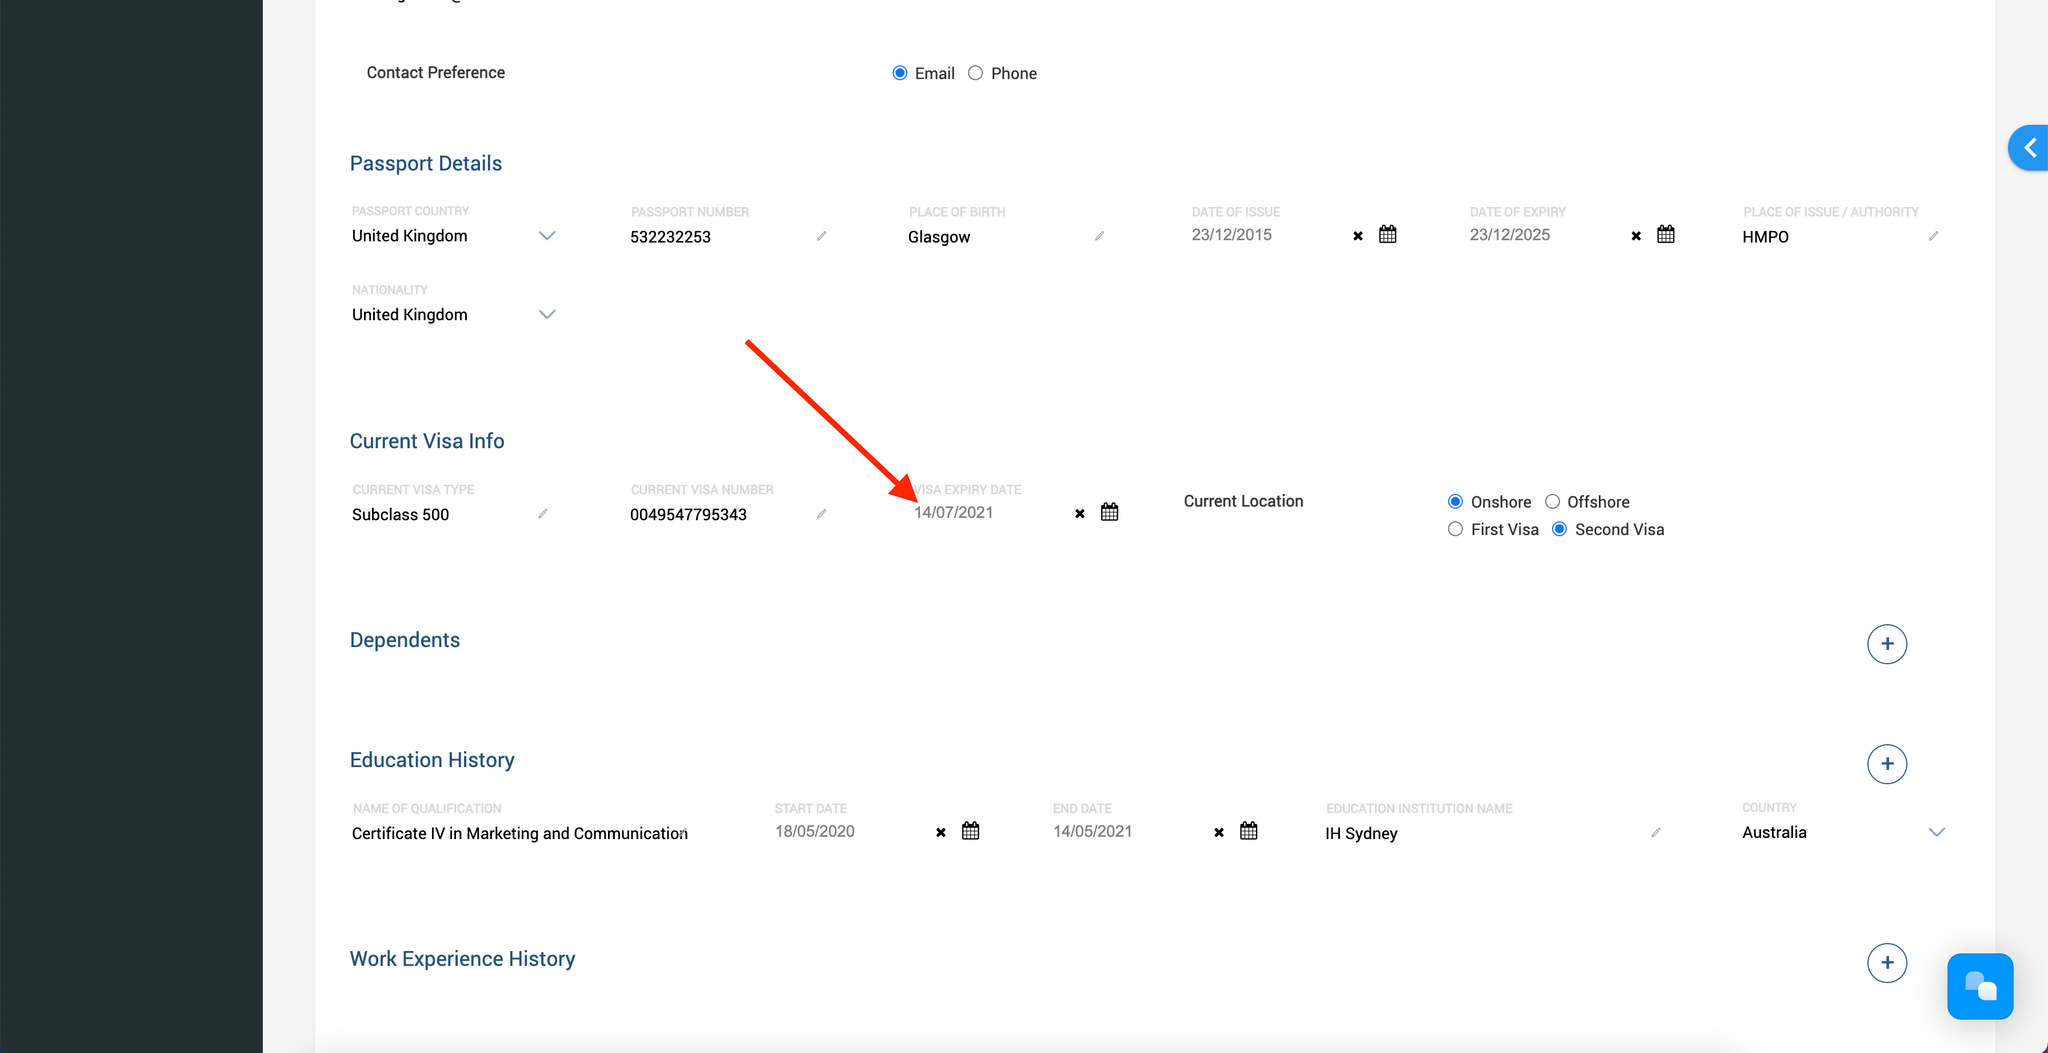
Passport Expiry Date
Set your Inteleagent system to send you and your student a notification email so you never miss the passport expiry date. You can set your notification in
Settings → Notifications and student's notification in Settings → Automations 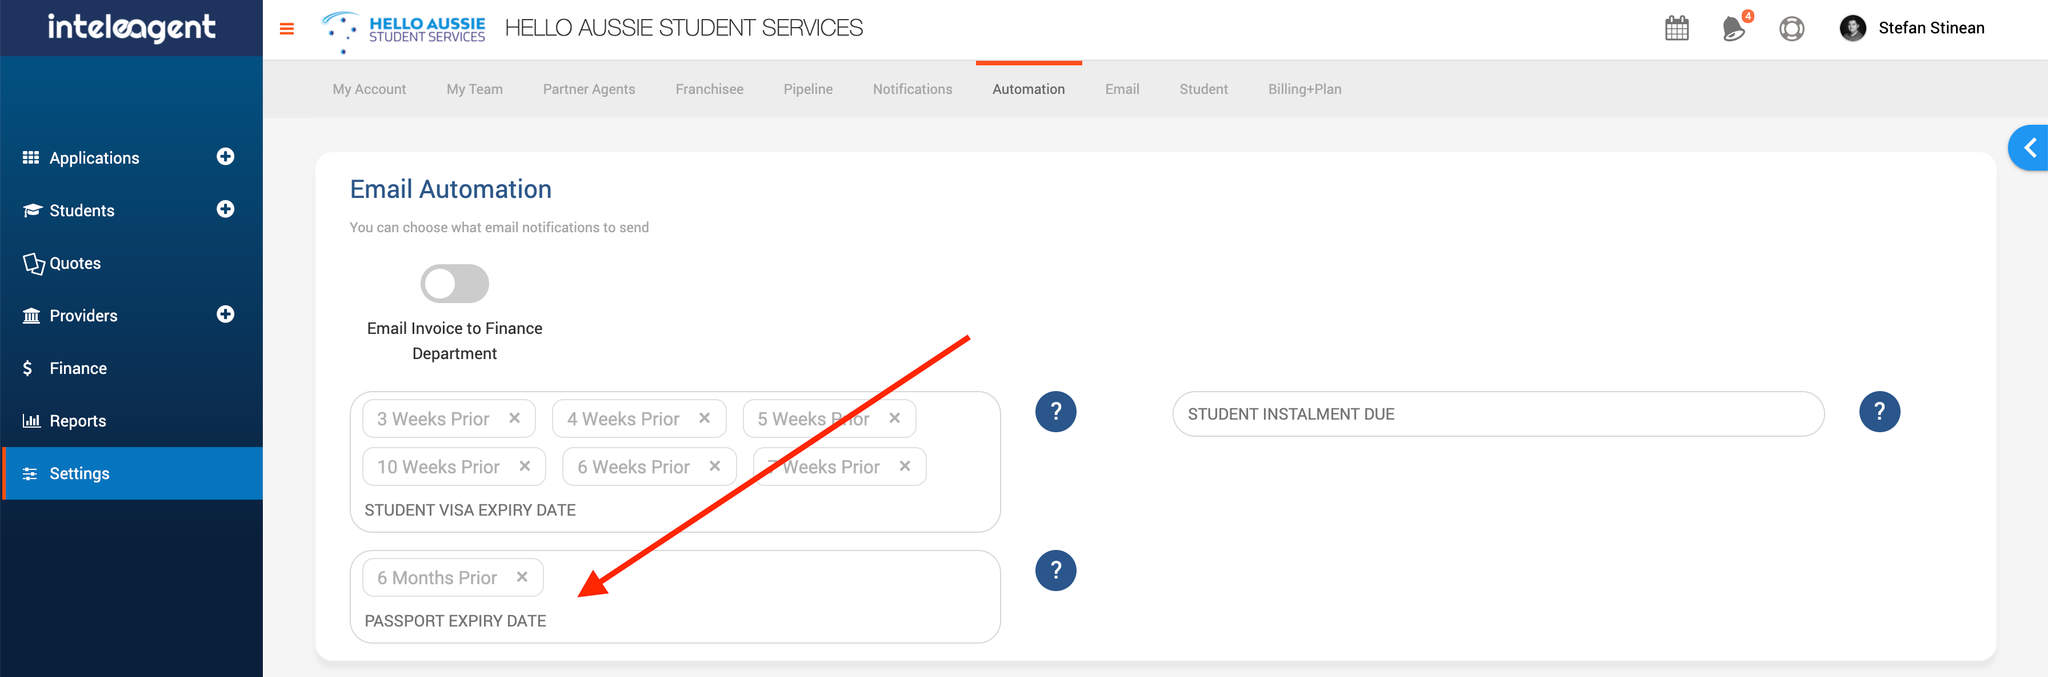
You can set the period of your email notification for the visa expiry date for you in
Settings → NotificationsYou can set the periods for the email notifications for the visa expiry date for students in
Settings → Automations Import your student data in Inteleagent