IN THIS ARTICLE
Quick Start checklist
- Step 5: Create your first application
Inteleagent was built to make adding applications as easy as it gets.
Adding an application in Inteleagent
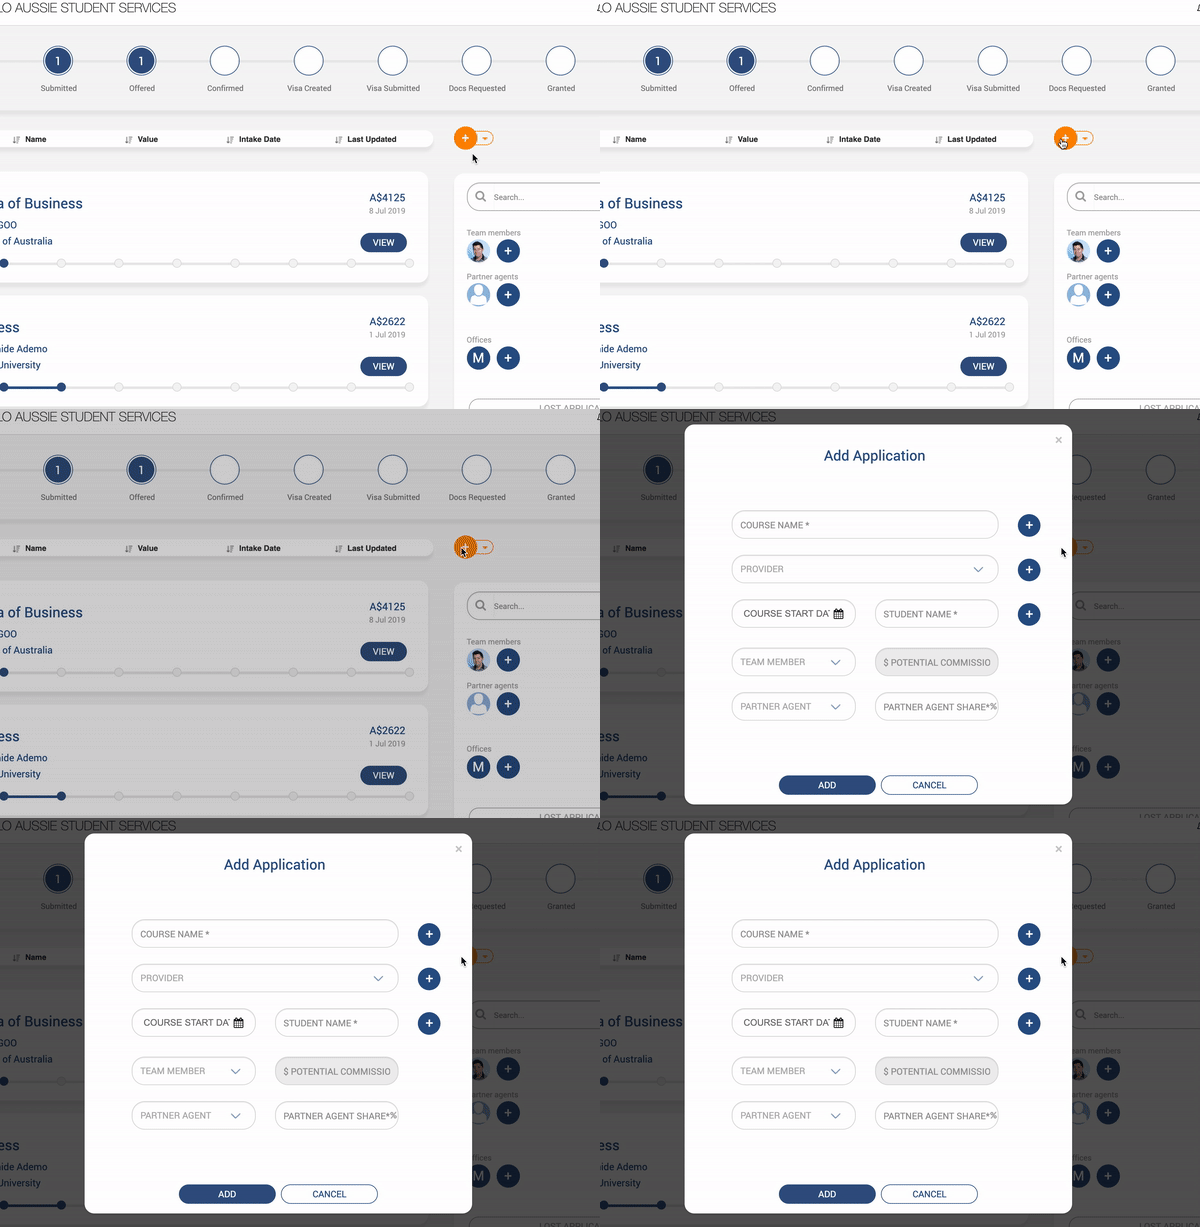
To add an application in Inteleagent, all you have to do is hit that orange round “+” button on your Applications menu page. A pop-up will come up asking for the application information. You will need to insert the course name, the education provider, the course start date, student’s name, the team member to whom this application is assigned to. If your application will be sent through a partner agent, you can choose the partner agent from the drop down menu, and insert the commission percentage your partner agent will receive for the application you send him.
Click Add button to add the application to the system. All this information will be saved in the database, therefore you only have to do this once.
Adding a course
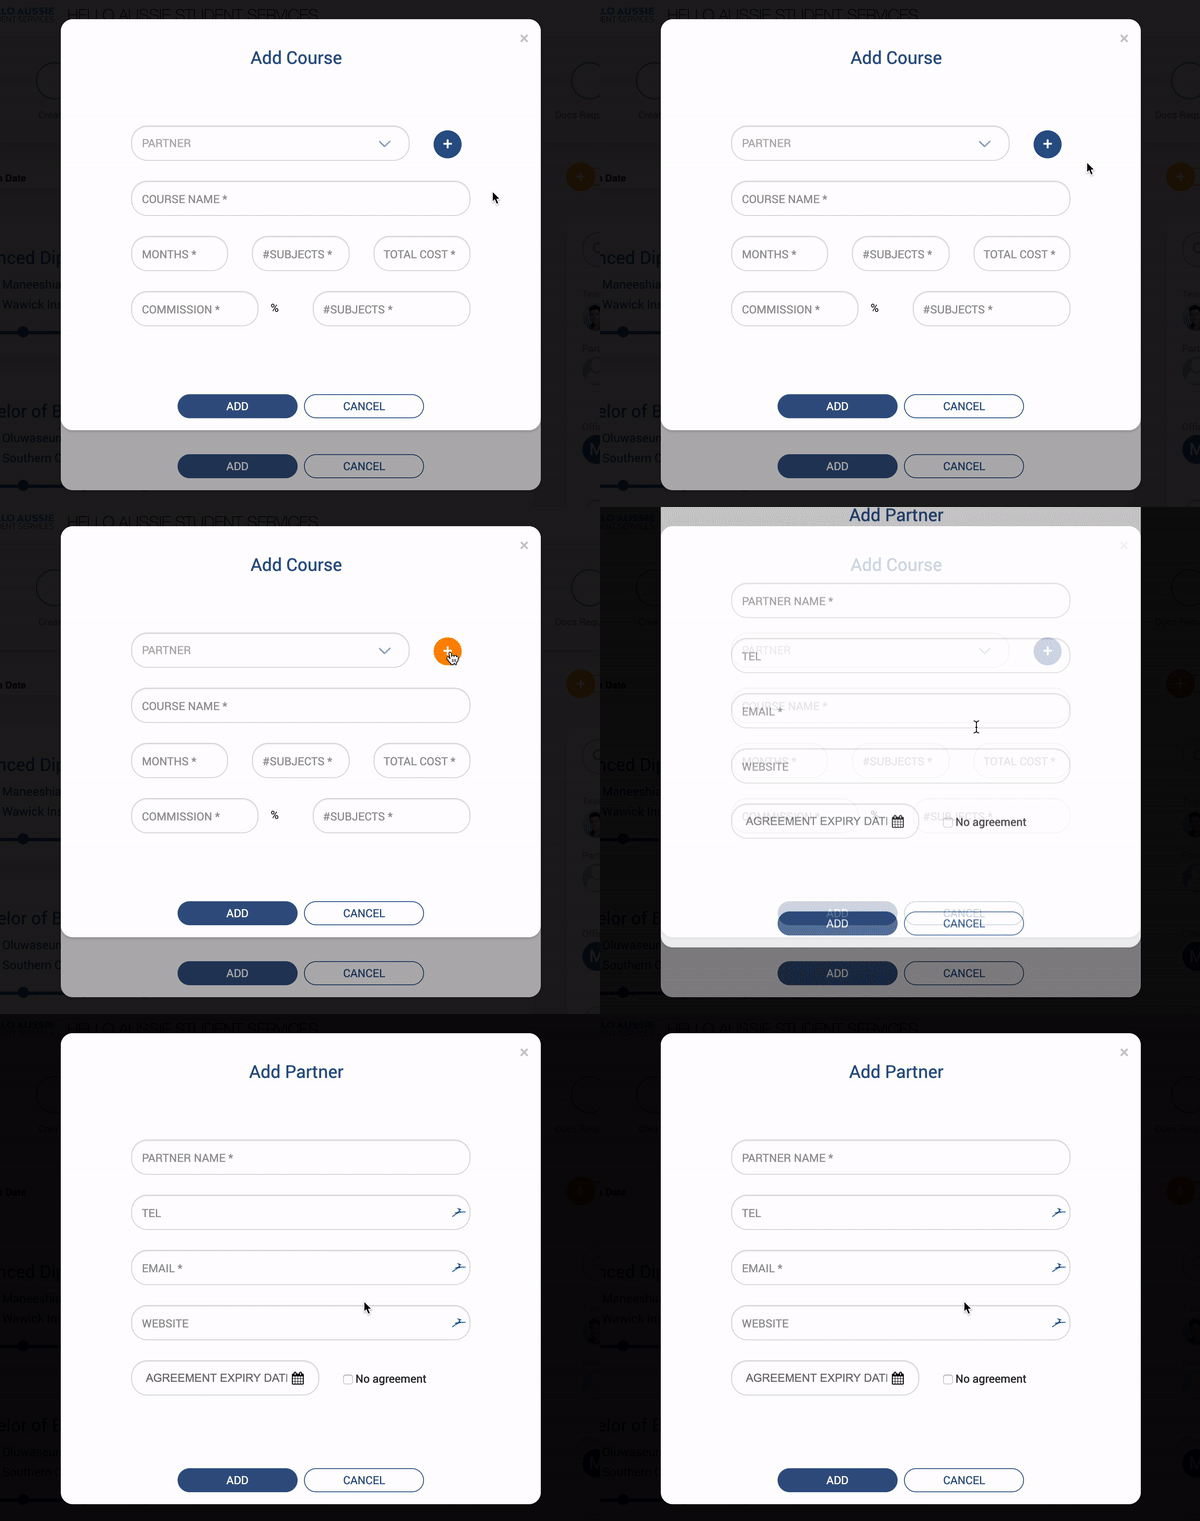
If the course is a new course, which will most likely be if this is the first time you send an application, hit the blue round “+” button on the right side of the Course Name field. A new pop-up will come up asking you to add a course.
Adding an education institution partner
If you don’t have the education provider in the database yet, and you need to add it, you can do this easily by hitting the blue round “+” button on the right side of the Provider field. This will trigger a pop-up inviting you to add the new education provider information. The information you will need is: the education provider’s name, phone number, admissions department email address, website, and agreement expiry date. All this information will be saved to your database and you wont need to add it again.
Scenarios
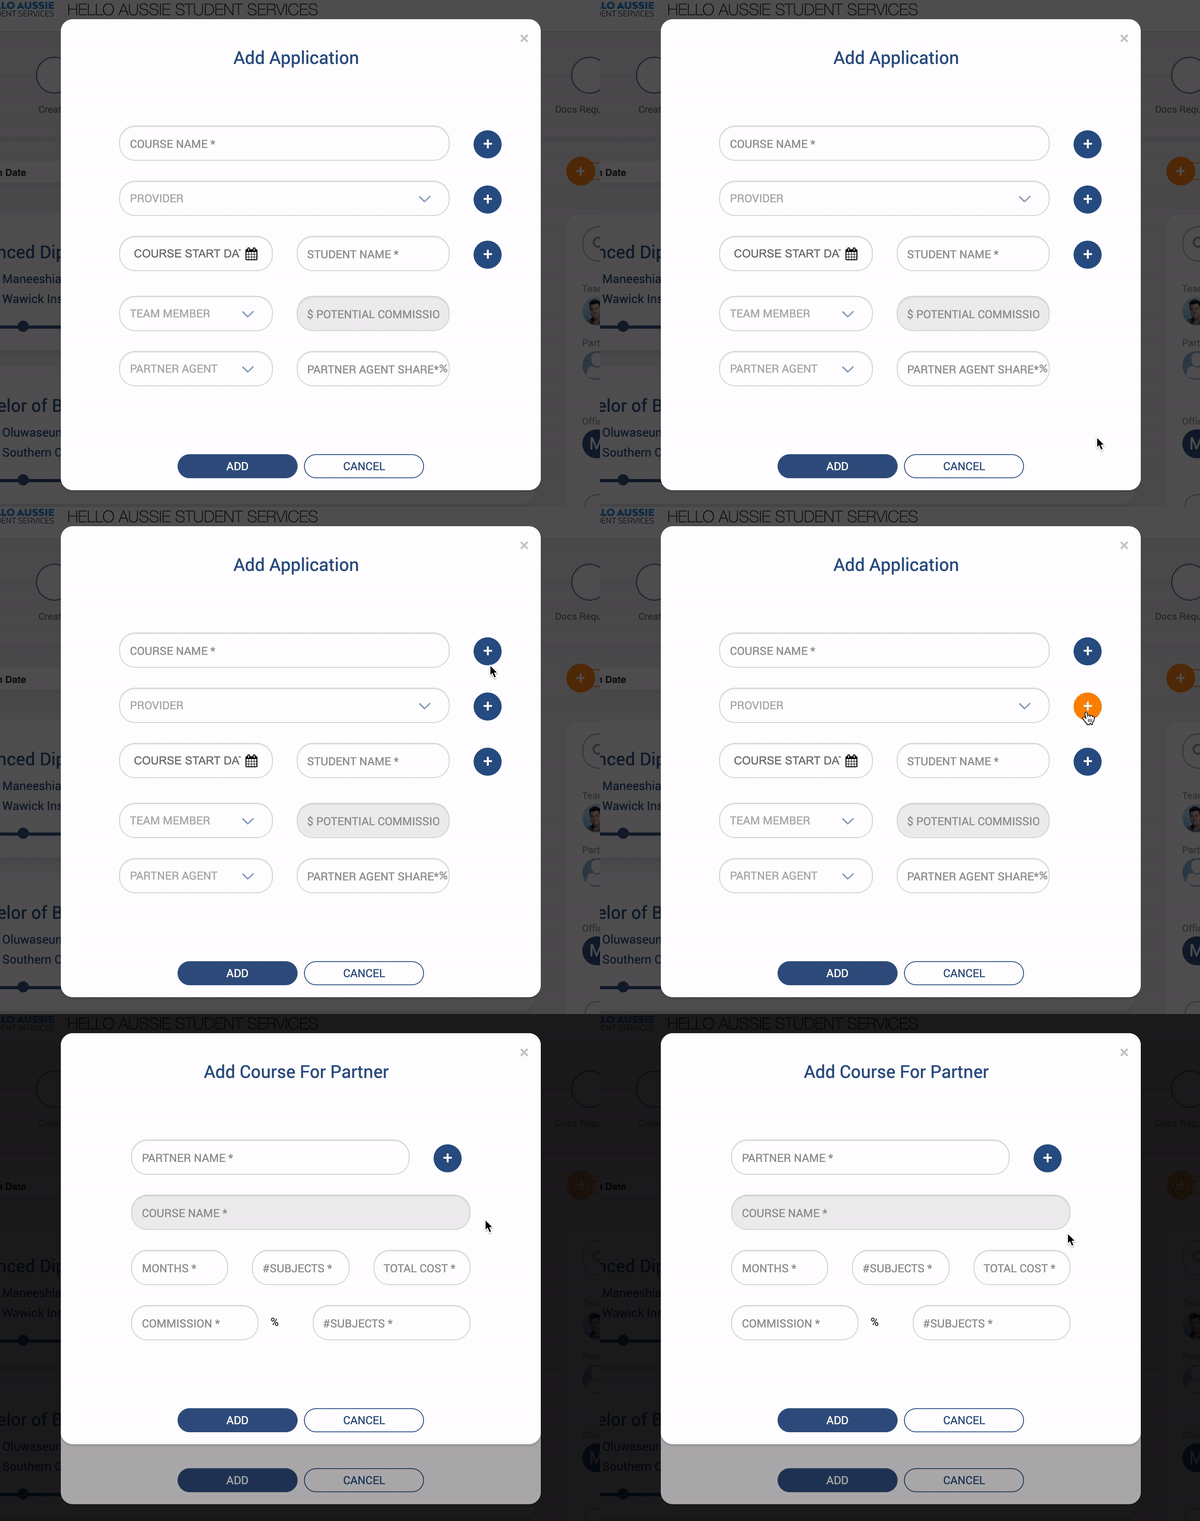
As you know, multiple education providers might offer the same course. Going back to the first “add application” pop-up, if the course is in your database already, but not the education provider, hit the blue round “+” button on the right side of the Provider field. This will trigger the “add course for provider” pop-up that will help you add that particular course to a new provider.
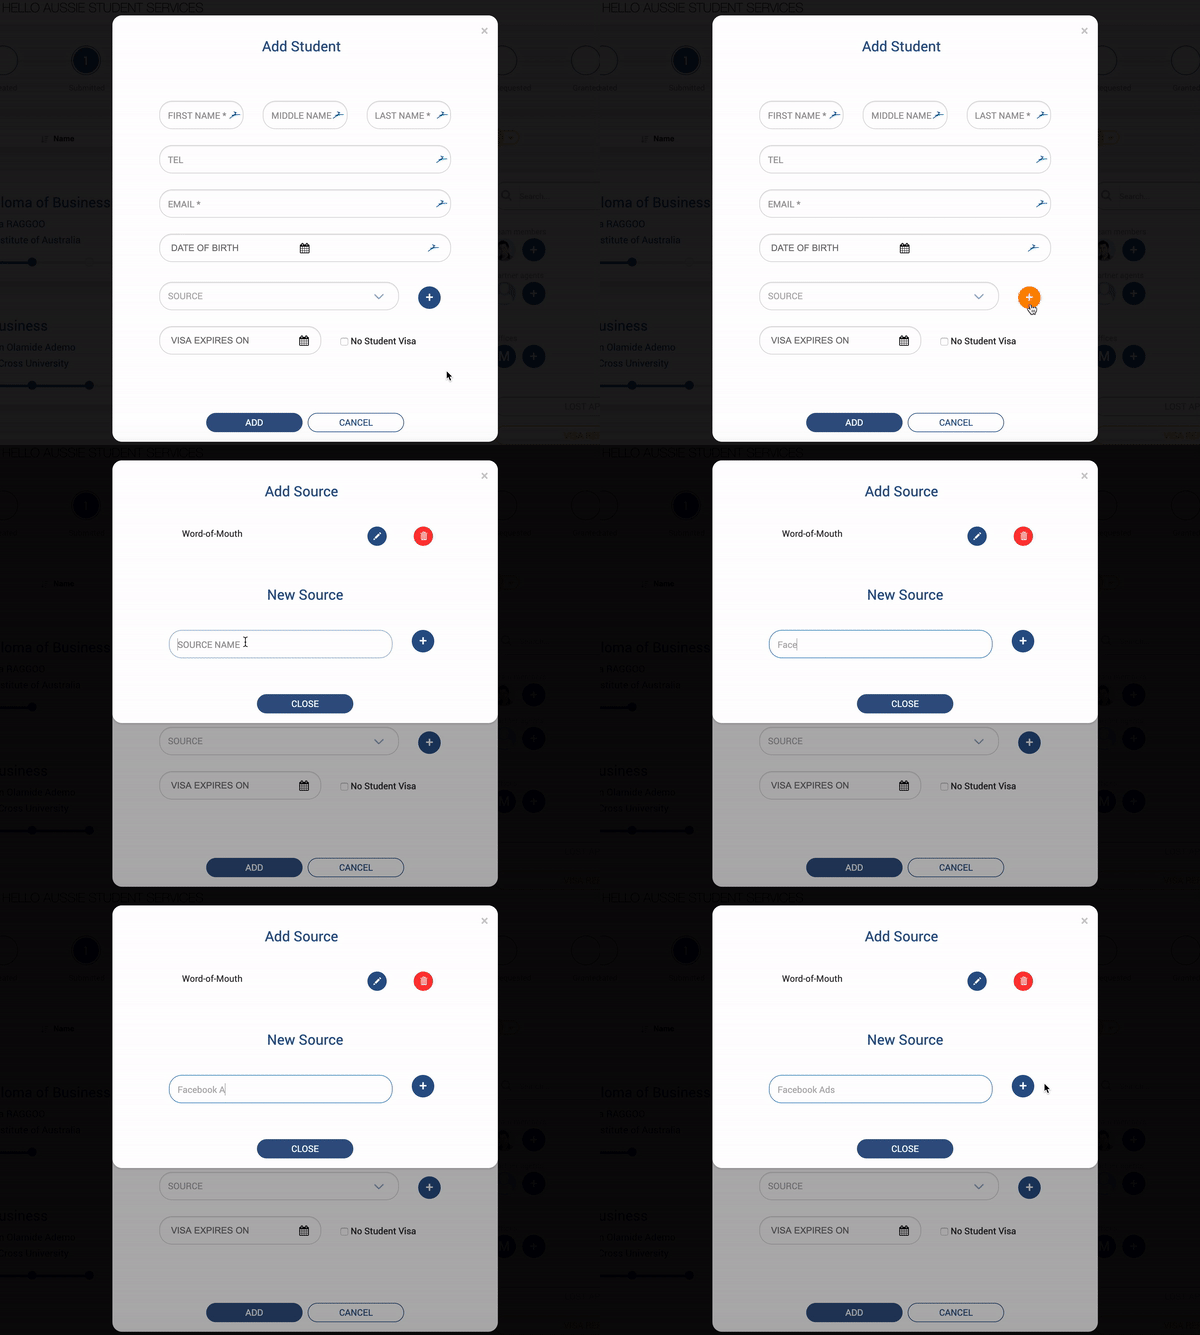
If the student name is not in your database yet, you can add it to your database from the “Add Application” pop-up screen. Just hit the blue round “+” button on the right side of the Student Name field. The “Add Student” pop-up will be triggered asking for the following information: Student’s first name, middle name, last name, phone number, email address, date of birth, source, the visa expiration date (if applicable).
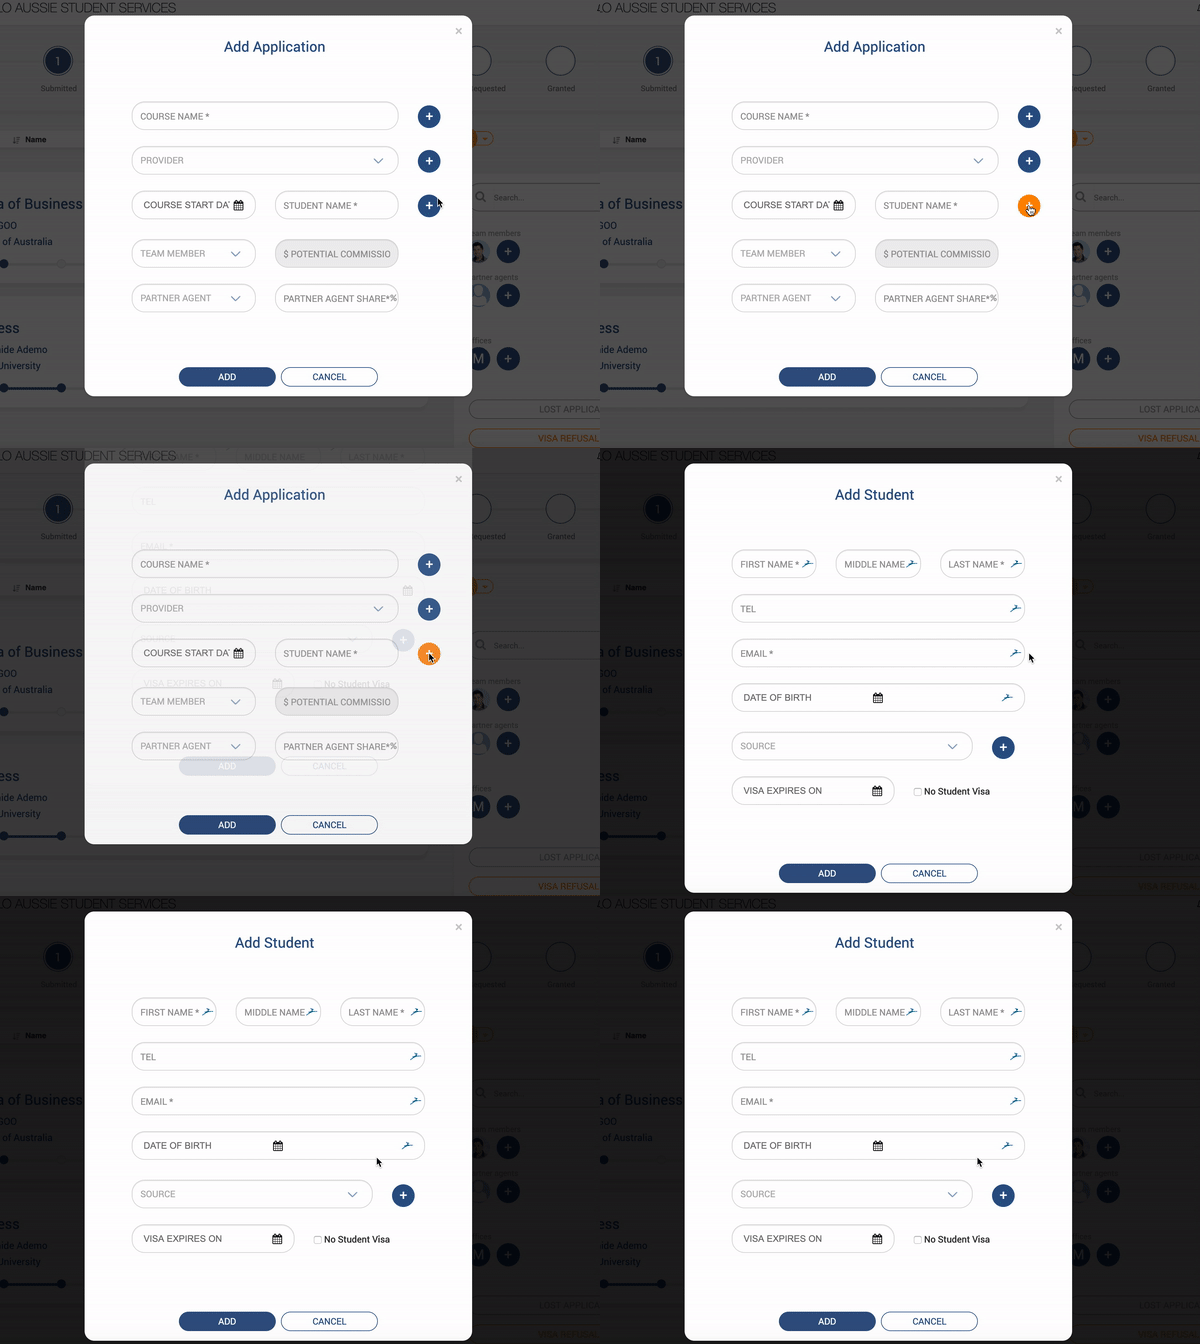
If the source of your student (what is the marketing source through which the student came to your agency) is not in the database, you can easily add it if you hit the blue round “+” button on the right side of the Source field.
That’s it! You are ready to go! :)
Quick Start checklist
- Step 5: Create your first application
